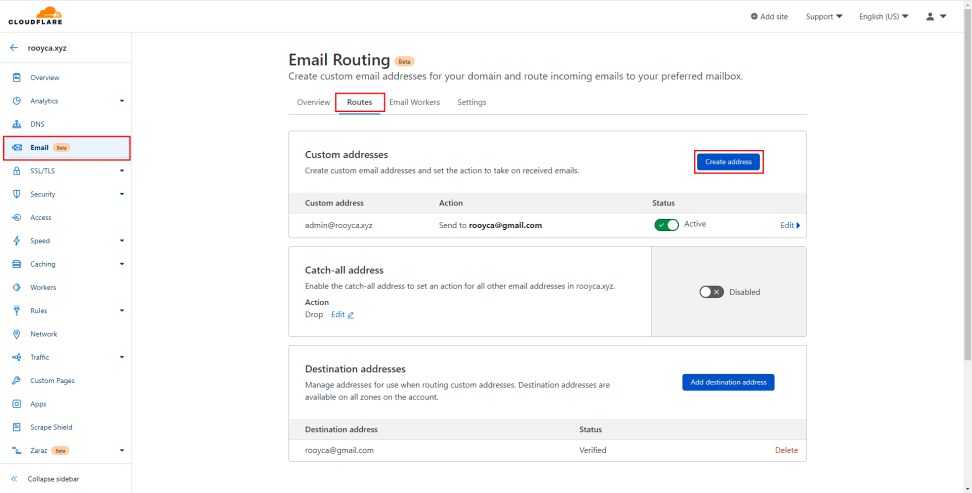
1 - Redirecting Traffic
The first thing to do is to redirect the traffic from our email account (in this case me@rooyca.xyz) to Gmail. To do this we go to our domain provider or our CDN of choice, in my case CloudFlare. Now we go to the Email > Routes > Create address.
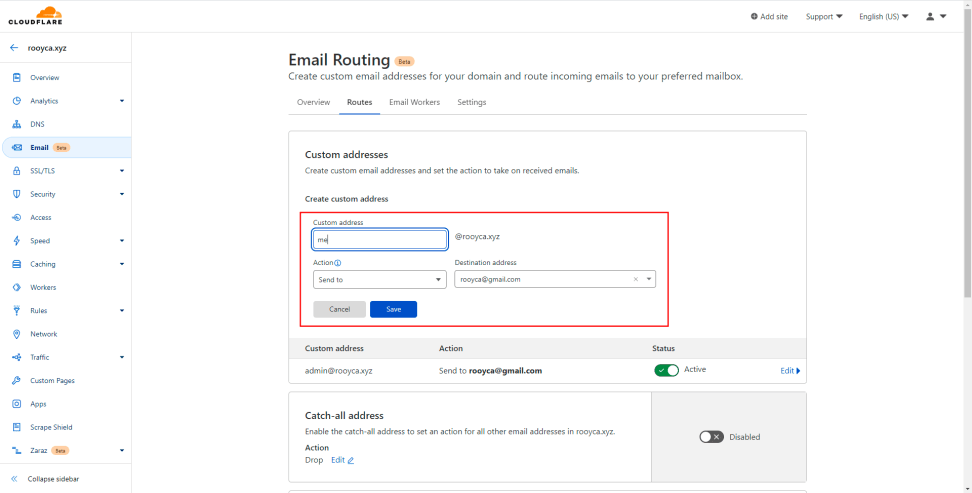
We create our address pointing to the Gmail with which we are going to configure our account.
Ok, with this we would have finished the first step. Right now we should be receiving all the emails sent to the email we configured (in my case me@rooyca.xyz) in our Gmail account. It is advisable to test that everything is working correctly by sending an email from another account. If everything works correctly we continue (if you have any problem do not hesitate to leave me a comment).
2 - Creating the password
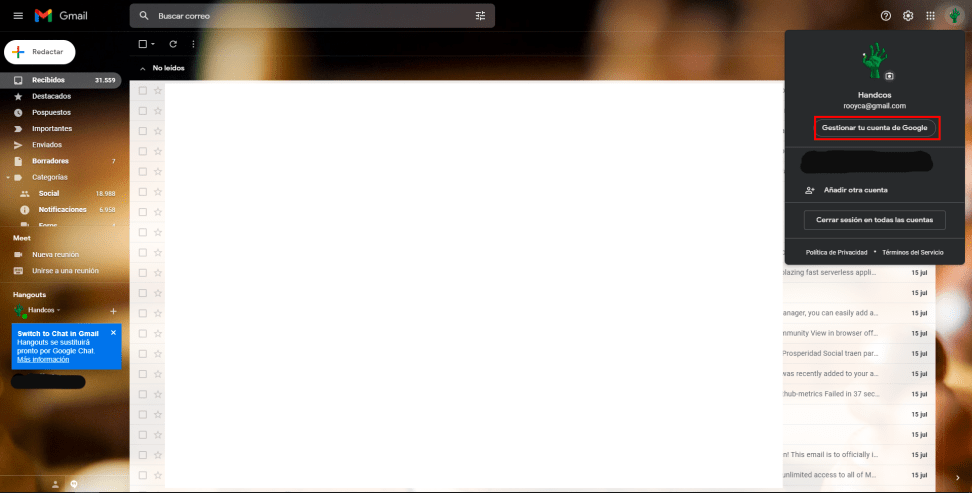
Next we will need to create the credentials with which we will log in later. To do this we click on our profile image and then on Manage your Google Account.
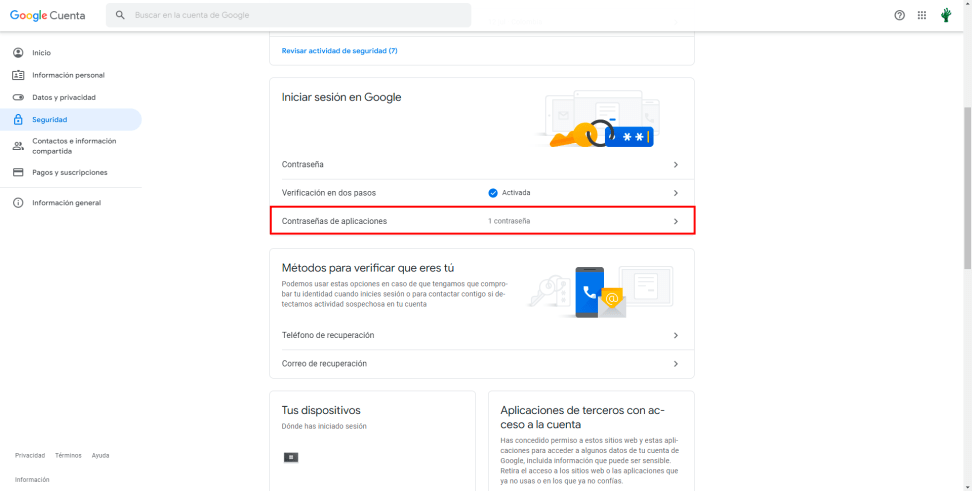
Go to the Security tab on the left panel and scroll down a little until you find the Application Passwords option.
We create new credentials. In type we put email and in device we put other.
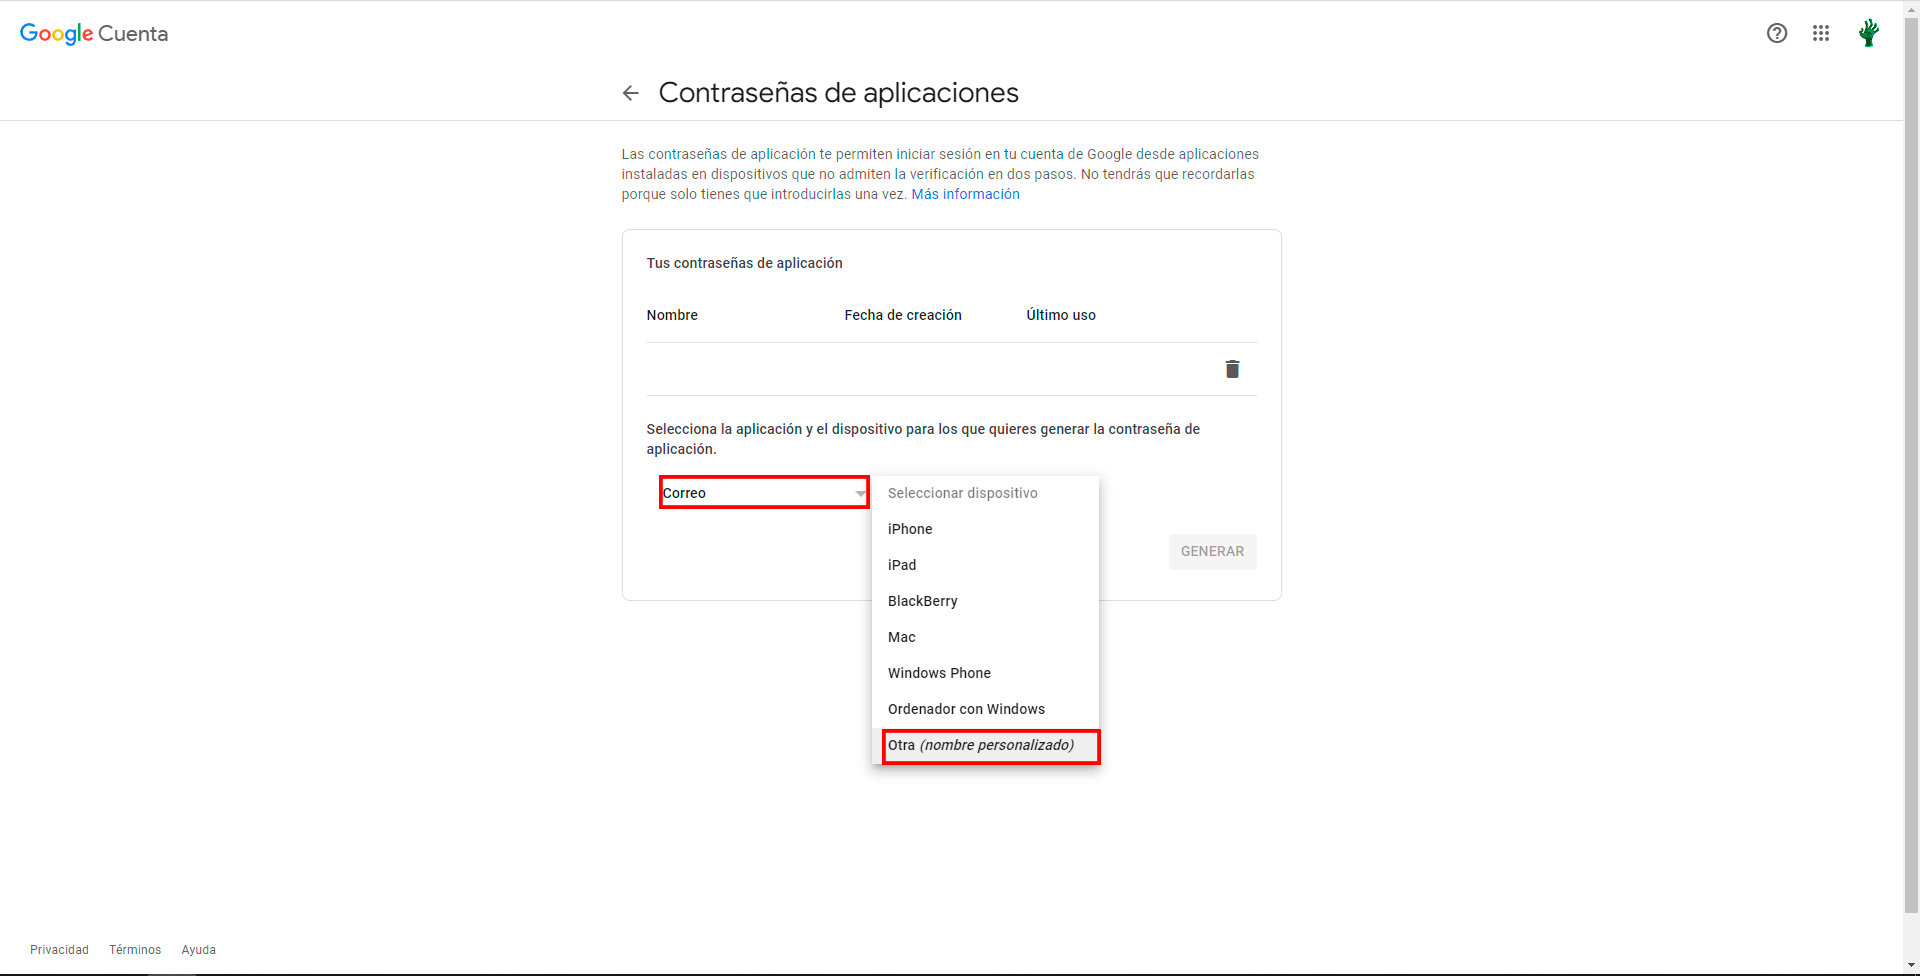
Now we set up the account we created in step one.
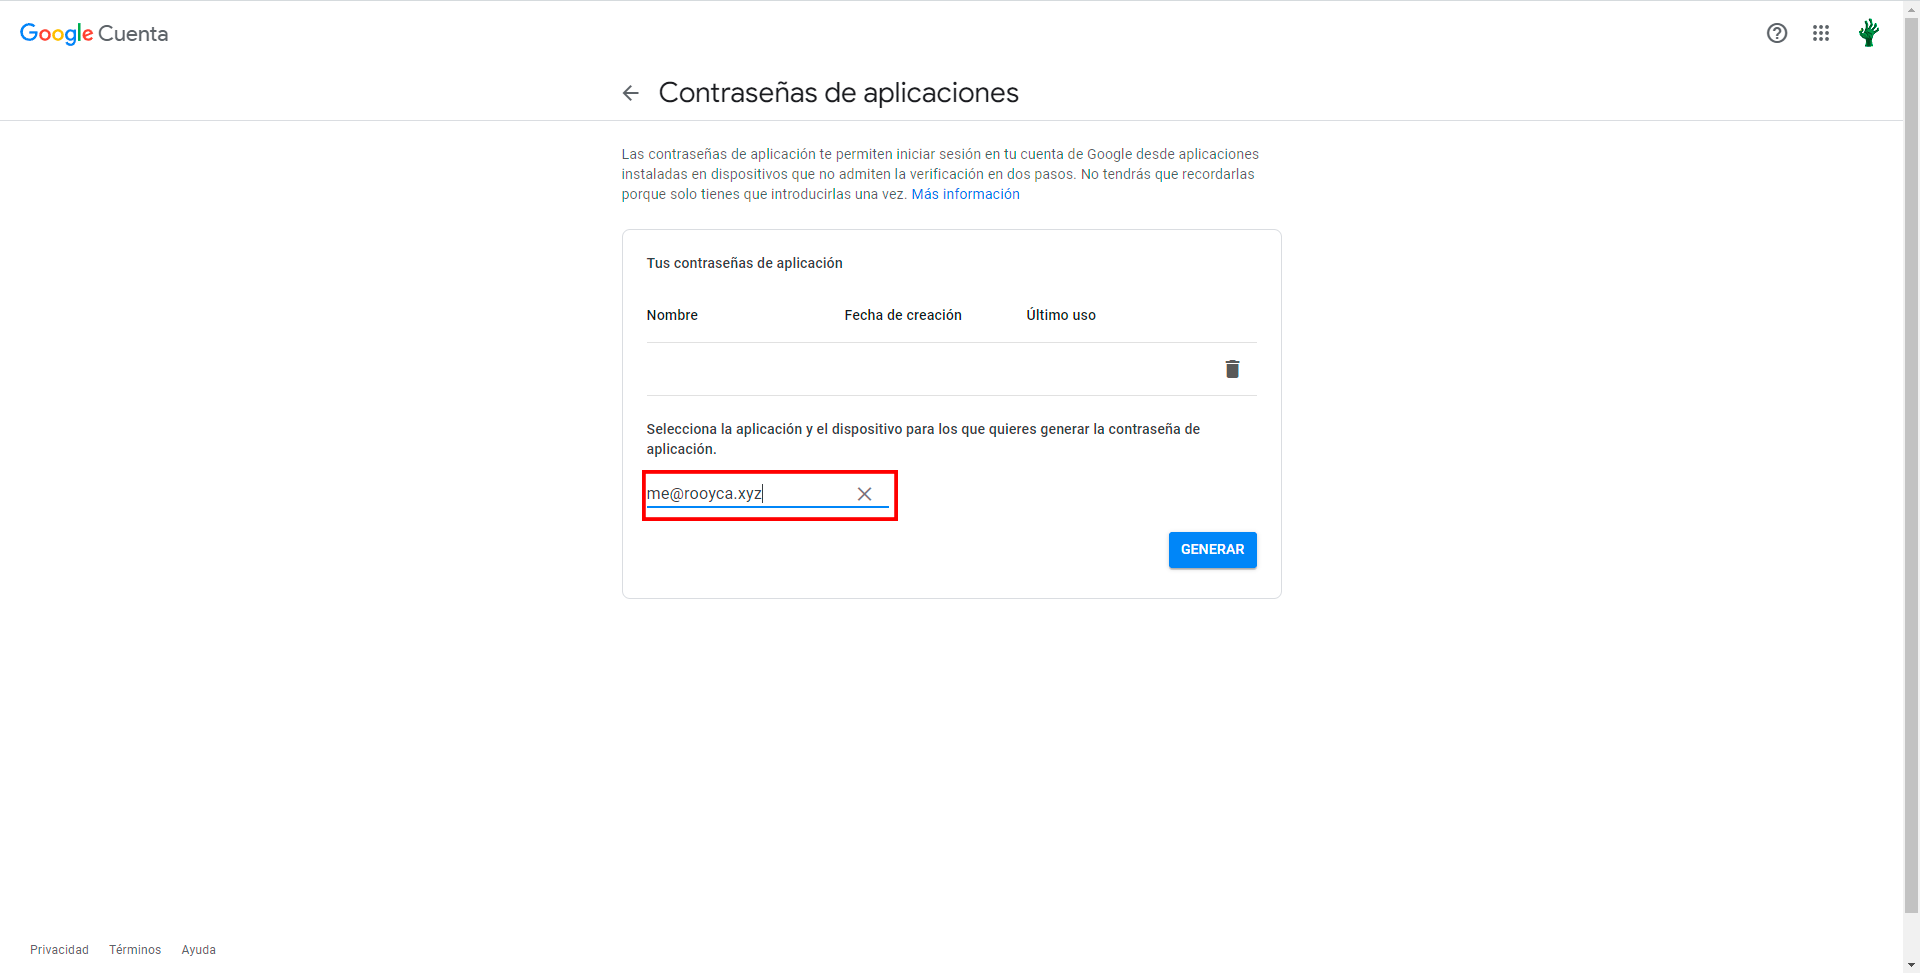
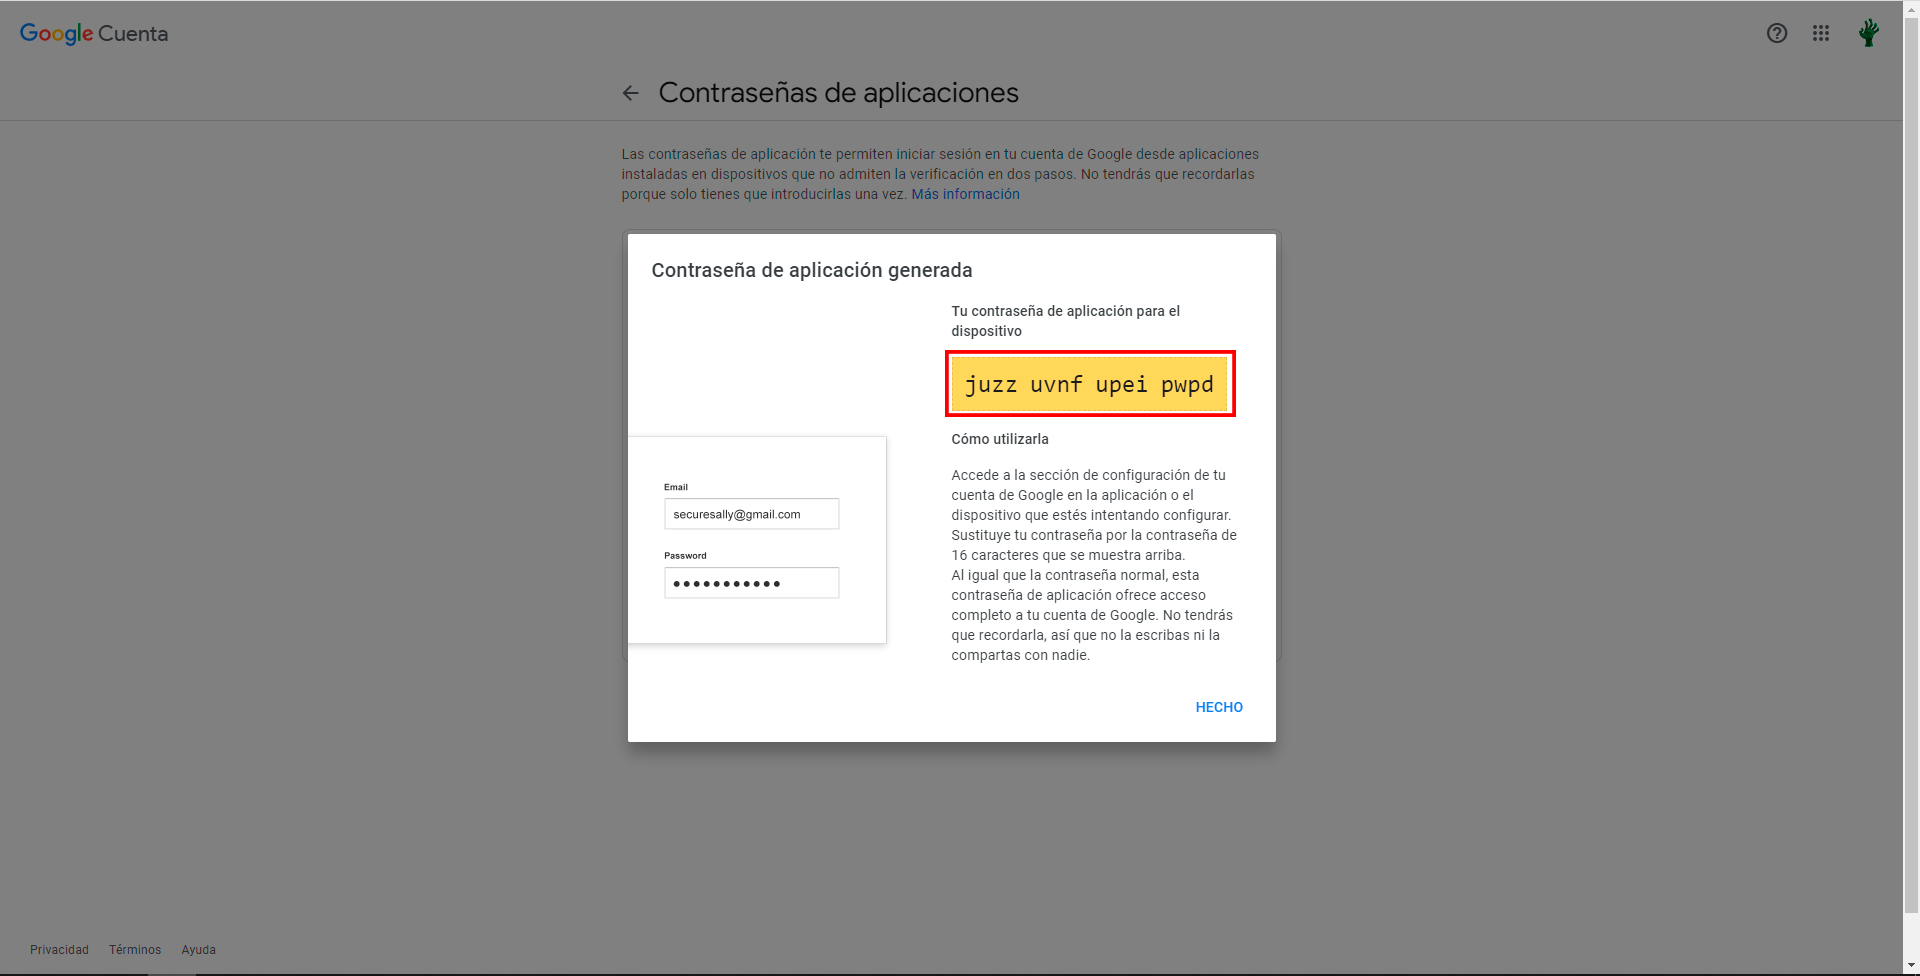
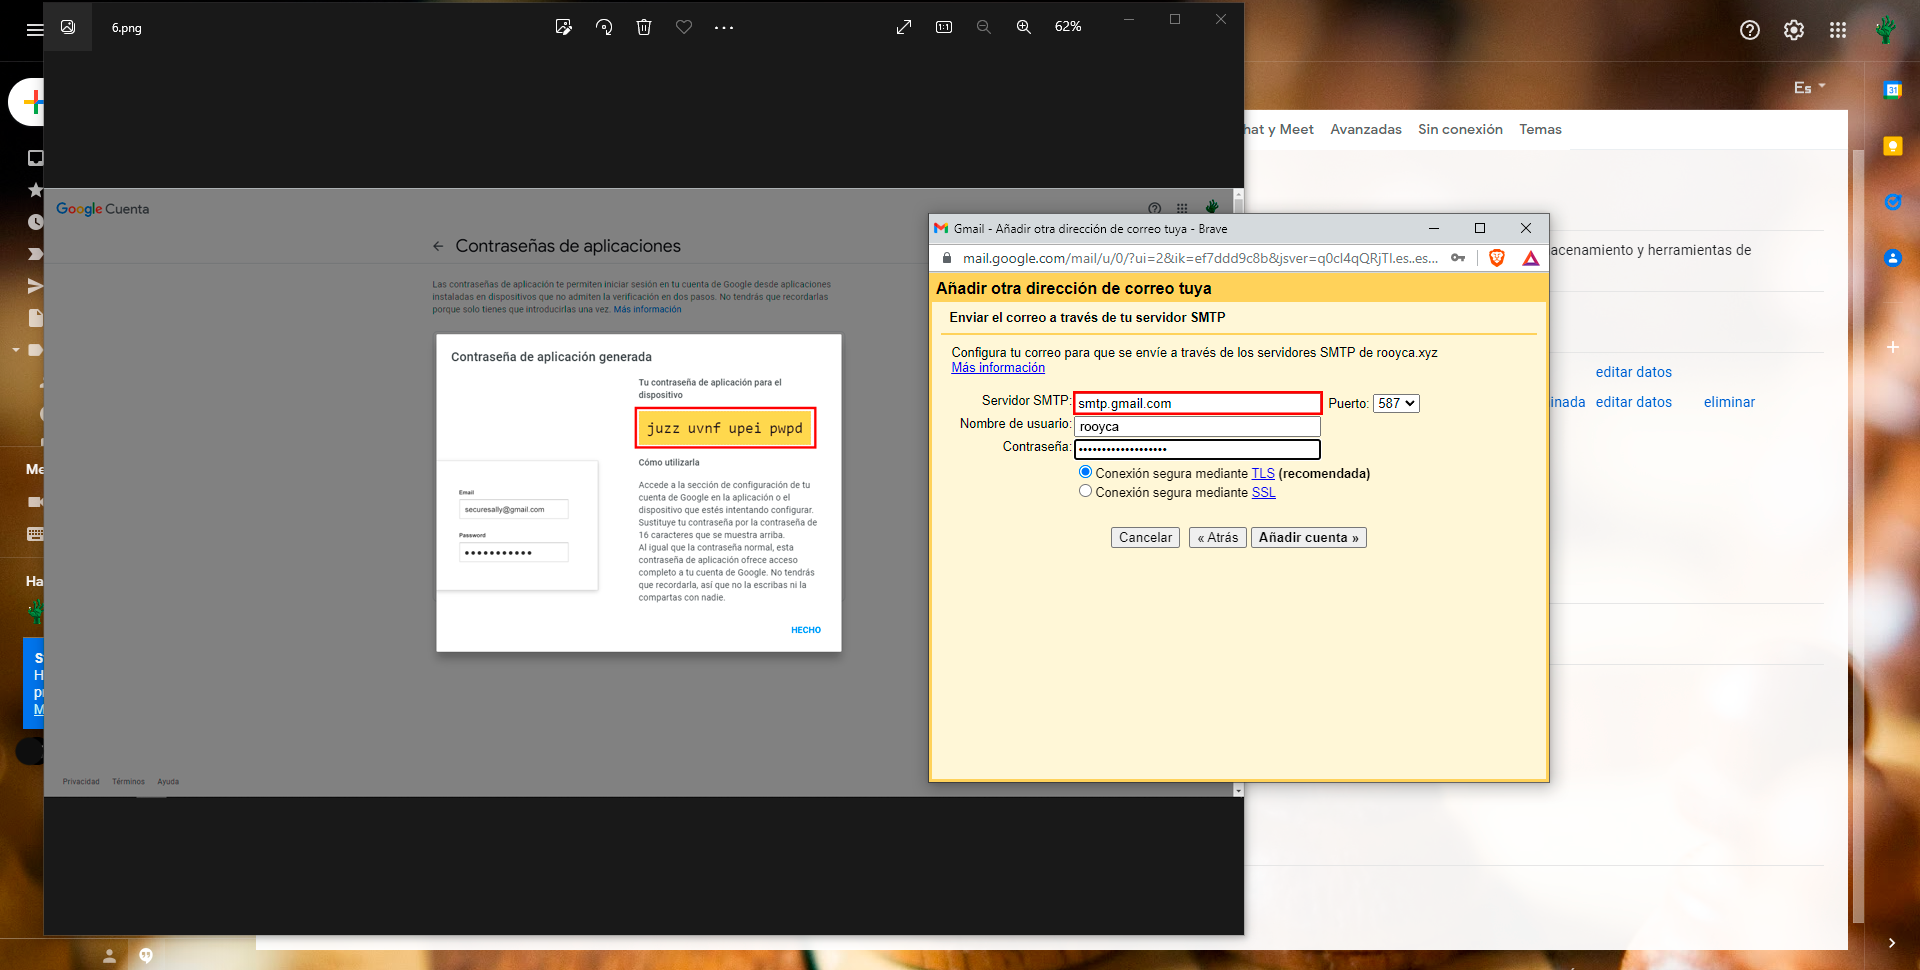
Done, our credentials will be generated, save them somewhere because we will need them later.
3 - Importing our account
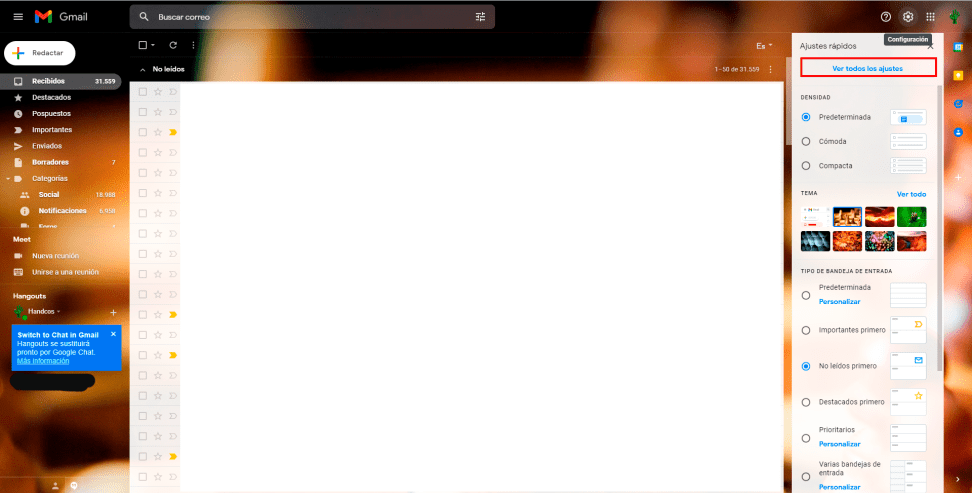
Now we go to Settings > View all settings.
Then go to Accounts and Import > Add another email address.
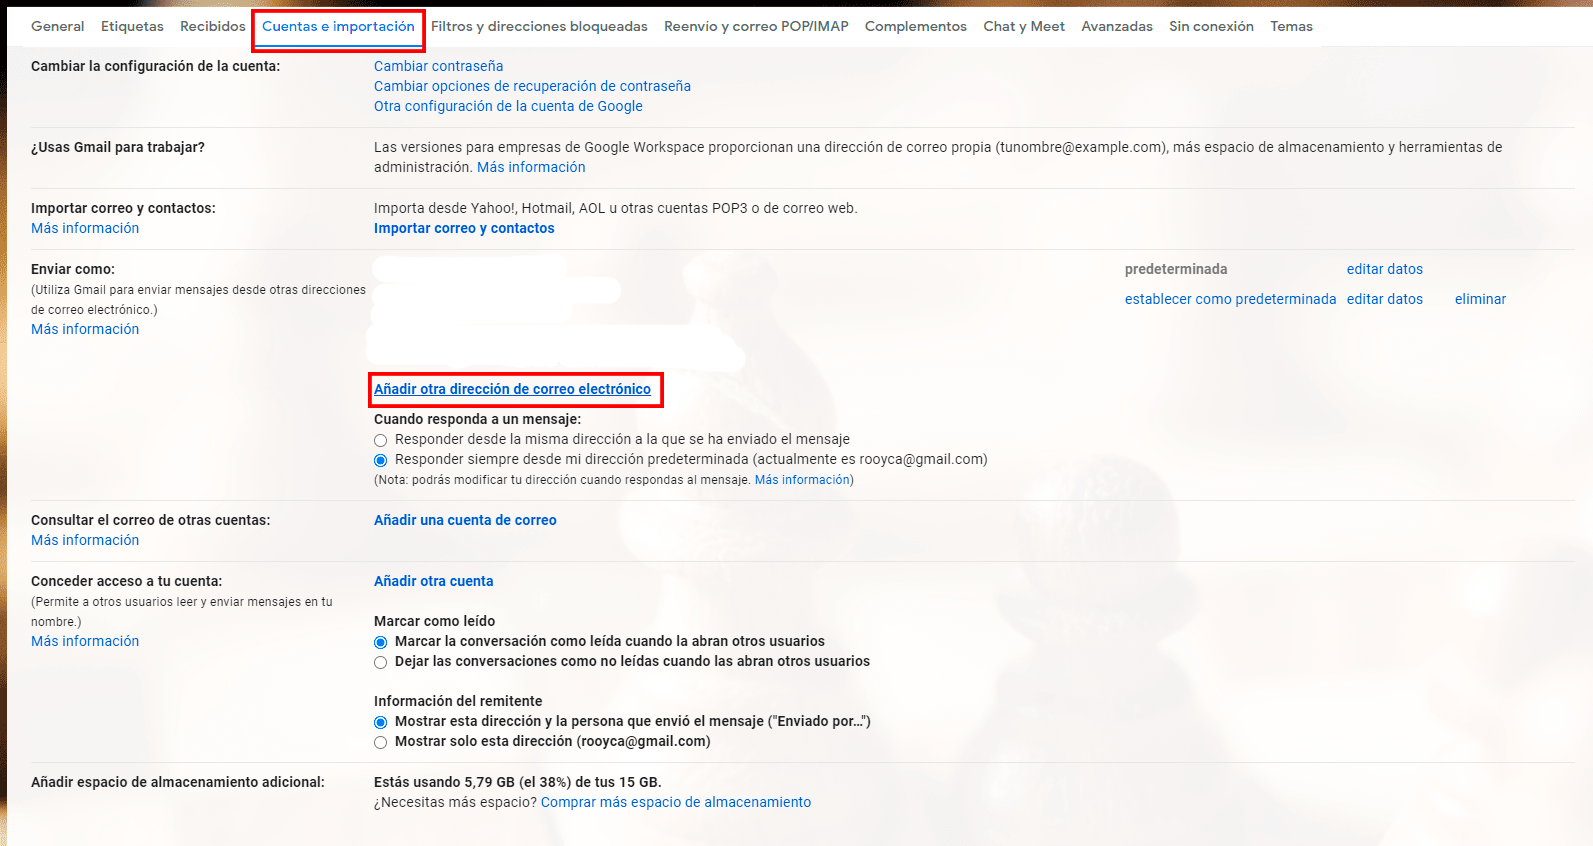
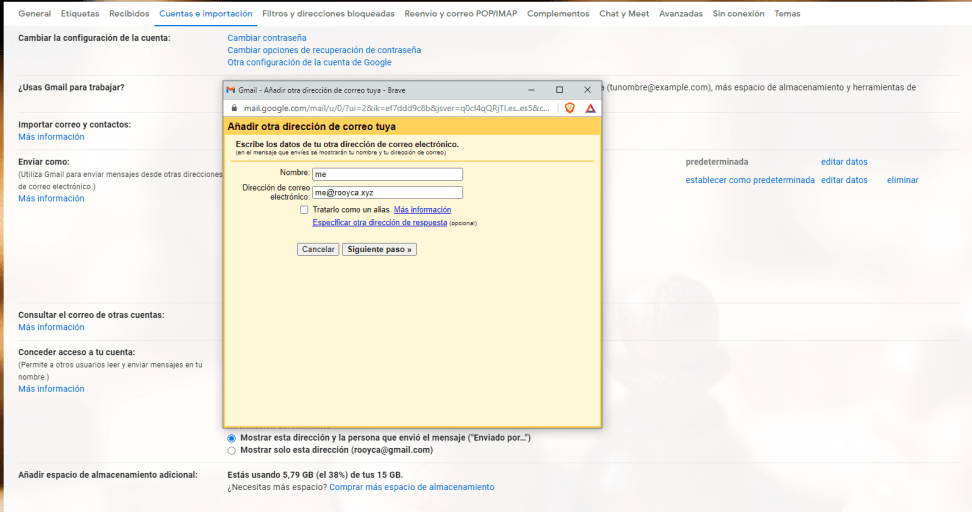
A pop-up window will appear in which we must enter our account name (the one that will appear when we send an email) and our email address created in the first step. It is important to make sure that the Treat as alias option is disabled.
Here it’s IMPORTANT to enter:
smtp.google.com
In the part of SMTP Server.
In Username we put the gmail account we are using but without the @gmail.com, in my case it would be rooyca. Finally, in password we enter the one we created in the previous step. The rest we leave it as it is.
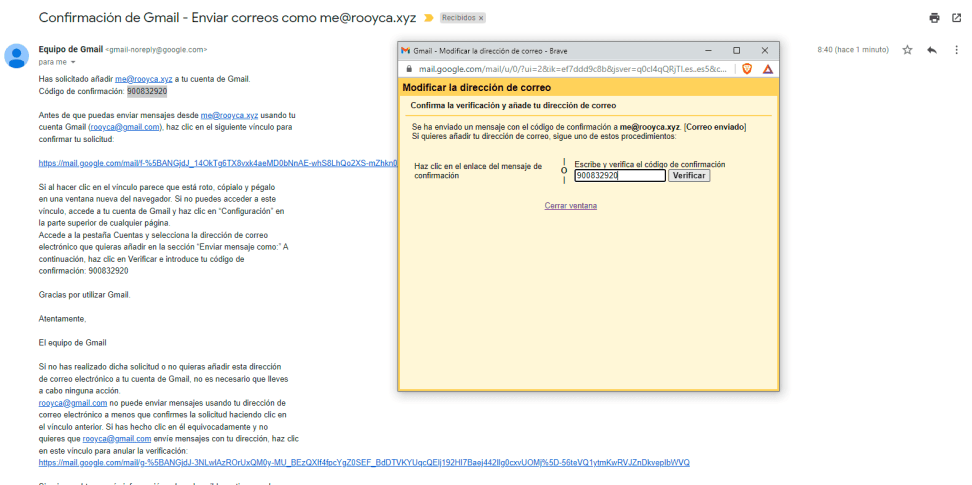
After clicking on add account a window will appear asking for a verification code.
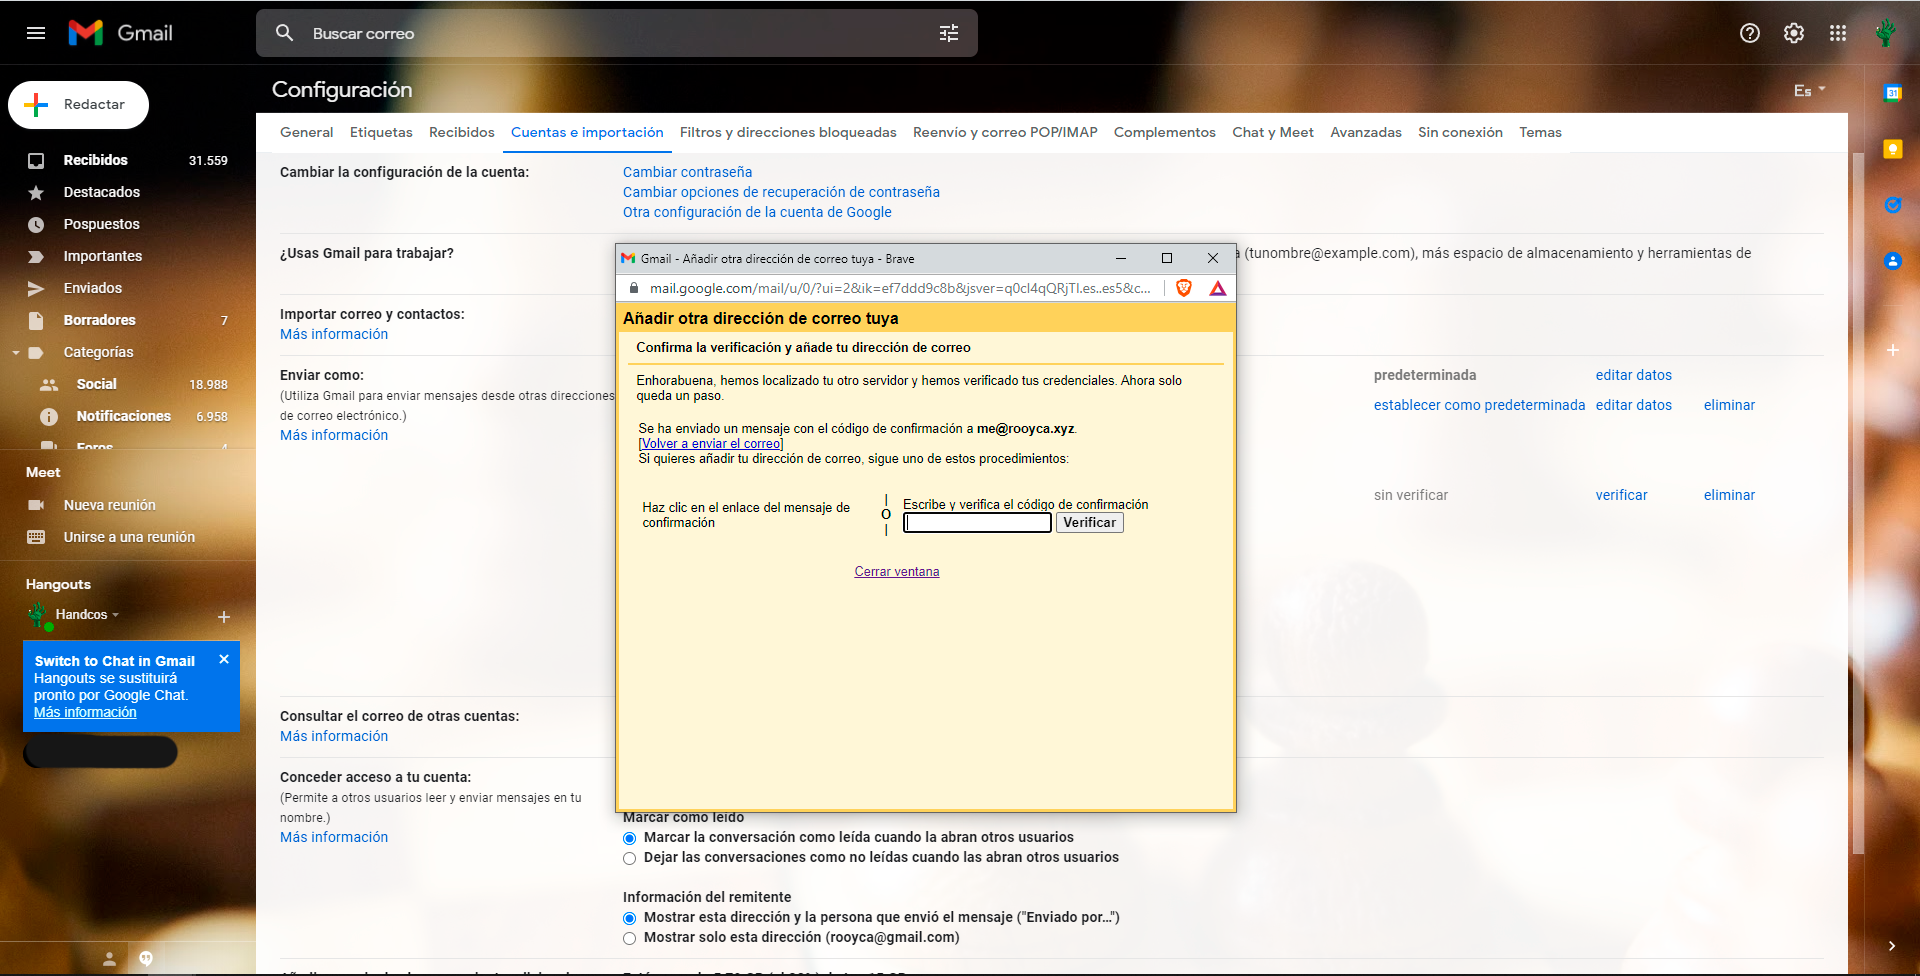
We check our inbox and we should have a email with the verification code and a link to complete the verification.
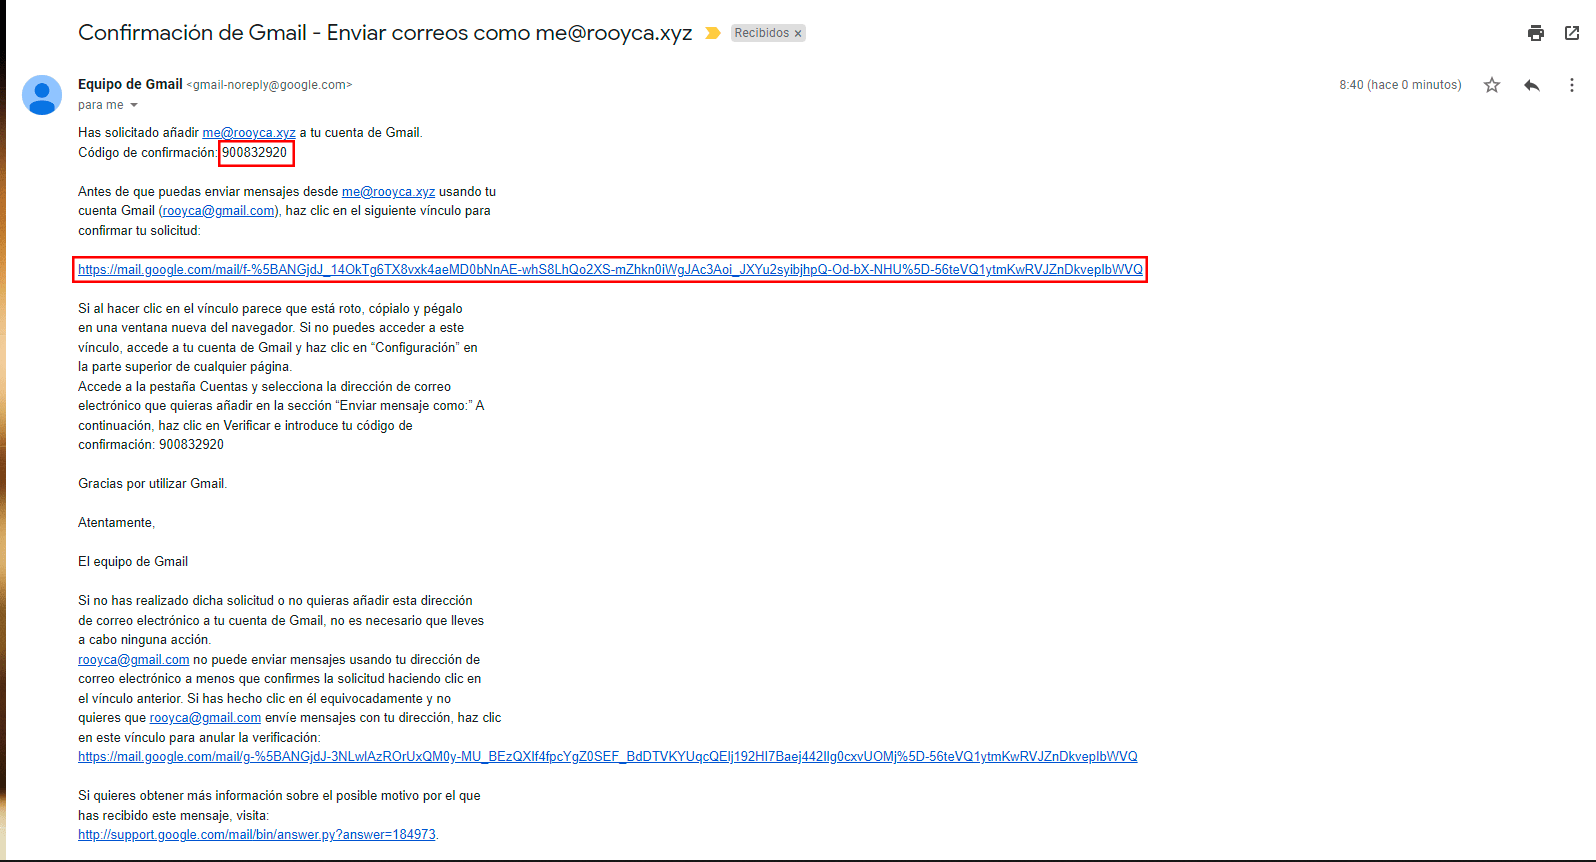
Copy and paste the code into the window. And then click on the link.
A new tab will open in which we will confirm that we want to send e-mails with the account we created.
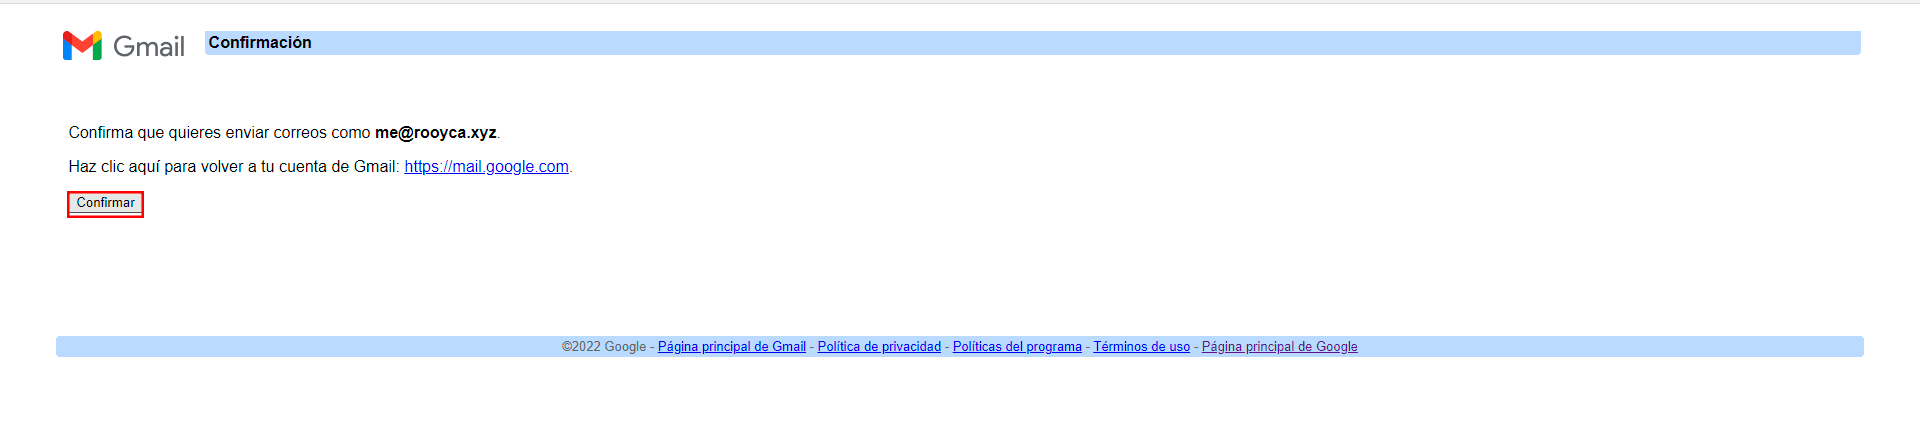
If we go to the Redact section we can see that we can now send e-mails from our address.

And that would be all, it is that easy to set up an email address with our domain. Remember, if you have any doubt, complaint, suggestion or claim do not hesitate to let me know.